Friday, October 31, 2014

Pom Pom Spider Hair Clips

HAPPY HALLOWEEN!! 

The big day has finally arrived and while I'm very excited for the fun my girls will have Trick-Or-Treating tonight, I'm also relieved that all of the costume planning/making, school parties, pumpkin carving and all of the other Halloween related activities have come to an end. I am one tired momma, lol.


Amongst all of the other Halloween stuff we've been doing, Lydia, Jill and I took an evening to make some hair clips. And let me tell you, you don't need a whole evening to make these creepy cuties. With about a half an hour, you can have these whipped up before your kiddos go out trick or treating tonight!


Can't Get Started Without:
~black worsted weight yarn
~chenille stems 
~googly eyes
~alligator clips
~glue gun and glue
~fork
~thin black ribbon (optional)


To get started on these guys, you need to begin by making yarn pom-poms. The ones we made were about an inch in diameter, but can be made any size depending on how big you want them.

To make your pom poms, cut a piece of yarn about 5" long. Lay it in between the two middle prongs on your fork.


Next take your black yarn and wrap it around the fork prongs about 30 times and cut it off.


Now, with the yarn you previously placed in between the fork prongs, tie it up around the wrapped yarn. Make sure to tie it really tight as it will be holding your pom pom together. Lastly, remove the wrapped and tied yarn from the fork and cut the loops to create a small, round little pom pom.


You now have the bodies of your spiders.


To make your spider legs, take your chenille sticks and cut in between each puffy part. You should get 4 spider legs from each chenille .

Now is the time to take your thin black ribbon and line your alligator clip. This is an optional step, however, and can be skipped.

To attach your spider legs to the alligator clip, place a bit of hot glue on each end of the clip and place four spider legs on each side.


With some of the spiders we made, we bent the spider legs first, but you can also bend them after they're glued on.


Once the legs are glued on, place a dot of glue in the middle of the clip between each set of legs and glue your pom pom down.


Your spider is almost finished!

All you need to do is add your googly eyes and your little pom pom spider hair clips are finished!!


Aren't they cute?


The girls love them!


I adore how these little hair clips turned out! They are the perfect last minute craft that your littles' will love!


Thursday, October 30, 2014

Simple Halloween Costume {Despicable Me Minion}


While most of the little girls in town will probably be dressed up as Elsa or Anna this year for Halloween, my boys have decided to dress up as popular characters from another kid's movie....


That's right, they're going as Minions from Despicable Me!

Both of them are absolutely obsessed with these movies, and I can't blame them... they're pretty darn funny! And, seriously, these costumes were incredibly easy to put together.

I bought two white turtlenecks at a local kid's consignment store and dyed them yellow with Rit dye. Then, I picked up two rectangles of self-adhesive felt at JoAnn's and traced the "Gru" logo onto each piece. I cut the logo out and simply adhered one to each of their overalls. I didn't want to add a permanent logo, since these are overalls that they wear often and I didn't want them to be forever "branded". :)

And, finally, I picked up these adorable Minion hats at Target! They were originally $8, but I used a discount on my Cartwheel app and was able to grab them for $6... yahoo!
Easiest. Costume. Ever.


And they're a hit with my little guys. We're so excited to go Trick-or-Treating in our new neighborhood this year! The forecast is calling for snow, but hopefully it will hold off for the big night. :)

Happy Halloween!


Sunday, October 26, 2014

Much Ado About Monday {No. 83}

Happy Sunday!

Thanks for joining us for our 83rd Much Ado About Monday! I hope you all had a wonderful weekend! We've had so much fun carving pumpkins, going to the zoo, and catching up after our awesome trip to Norway earlier this month. I thought I'd share a few photos from our trip! 

When my husband said he had a business trip in Norway, I jumped at the chance to tag along. It was our first trip alone together since we've had kids, and very long overdue! Since his business was in Trondheim, we started there. It was such a beautiful city, overlooking one of Norway's largest fjords. We rented bikes and went to the highest outlook point over the city, and enjoyed the gorgeous fall colors. Our hotel was voted the best breakfast in Norway. No joke, it was seriously the largest breakfast buffet I've ever seen in my life, and my favorite item had to be the smoked halibut. Wow!


We drove the inland route to Trollstigen and camped in a cabin for a few days. While we were there, we drove that crazy curvy road, found a great hiking spot, and enjoyed the outdoors. The hike was more of  rock climbing in my mind... but worth it for the amazing view!


On our way back to Trondheim, we drove the costal highway. It was pretty windy, so we were able to see the huge waves crashing along the rocky coast. 


Since our flight home went through the Amsterdam, we extended our trip so we could spend the day in the city. We enjoyed a boat tour of the canals, shopping at a farmer's market for food and gifts to bring home, and exploring the city on foot. I was super bummed that we missed the Ann Frank House, because it was closed for Yom Kippur. But the Dutch apple pie definitely made us feel better about it ;-) And of course, after the long flight home, it was so great to come home to the kids! Surely a trip we wont forget! 


This week, Emily shared four fantastic Halloween printables, and I shared Miss Emmie's Halloween costume. She makes the cutest little bunch of grapes!


Thank you to everyone who joined in on our link party last week. Our fabulous features are:


Shabby Chic Pumpkins via Making it in the Mountains
Halloween Pom-Pom Wreath via Krafty Cards
Candy Corn Bars via Broward Saves
A Dog Coat Closet via Karen's up on the Hill


And Our most viewed link was Hairy Spider Cookies via I Dig Pinterest


Be sure to grab a button if you were one of our featured bloggers this week! And congratulations!!


And now, let's party!!

The Rules:

*We love our followers, and always follow back. Please follow us on GFC as well as BlogLovin:
Follow on Bloglovin

*You can also find us at these favorite social media sites: FacebookTwitterPinterestInstagram, and Google+
* Please link back to us in your post. Whether it be through a text link or by posting our super cute button somewhere in your post. We appreciate it!
* If you do NOT link back to us in your post, you will NOT be Featured on Much Ado About Monday. So, link back! You'll thank us later. :)

*Features posts will be pinned on Pinterest and promoted on Facebook and Google+
* Feel free to link up decorating tips, DIY projects, recipes, organizational ideas, sewing and crochet creations or anything else crafty or that you find inspirational.
* Please do not link up giveaways, Etsy shops, or projects that were not made by you.
* You may link up to three posts a week!
* If your post has been featured, please do not link it up again.
* Remember to visit, visit, visit! That's the point of a party, right? Have fun!
Thanks for stopping by to party with us!!


Friday, October 24, 2014

Last Minute Halloween Costume {Grapes}

I just love Halloween! And having kids makes it so much fun to celebrate. We usually do themed costumes like this, but this year we ended up with three very strong opinions on costumes (mine counts right?). So a pink poodle, jedi, and bunch of grapes it is.


I've always wanted to dress my little one up as grapes, since it's sort of a Halloween tradition. My mom dressed my sister and I as grapes when we were little, and it was super cute. How much simpler can you get? A leotard and balloons, and I cannot get over all of the cuteness!


So our family went to Zoo Boo, and we tried out miss Emmie's costume. It turned out way too cute not to share, so I played papparazzi before we left! What a great last minute costume, especially for those with toddlers who refuse to put costumes on! Who can turn down balloons?


To attach the balloons, I just used some safety pins. It's that simple, no skills needed :-)


Curling ribbon worked great for the stem, and Jamie whipped up a little grape hat for Halloween! I'll be sure to update after the big night. Hope y'all have a happy and safe Halloween!


Thursday, October 23, 2014

Four {Free} Halloween Printables

 
BOO!
 
Can you believe that Halloween is just around the corner? The kids are getting so excited about upcoming school parties, trips to the apple orchard and pumpkin patch and of course, trick or treating!
 
I haven't had much time to decorate this year, so I plan on printing out a few of these great printables (designed by the Lovely Ladies of Huckleberry Love, of course!) to place around the house for a bit of spooky Halloween décor. We hope you enjoy them and are able to use them as part of your Halloween décor this year, too! :)
 
Jill
 
 
Emily
 
Jamie


Lydia


Hopefully one of these suits your fancy! If not, be sure to check out our collection from last year for more great Halloween Printables.
 
http://www.huckleberrylove.com/2013/10/five-fabulous-halloween-printables.html
 

Sunday, October 19, 2014

Much Ado About Monday {No. 82}

Let's get ready to party!!
Welcome to the 82nd Much Ado About Monday link party! We are so happy you are here!

This weekend was a busy one for us, and we decided to divide and conquer. My husband took the two oldest kids with him to visit his mom in San Antonio and I had the youngest and went to help my sister prep her house for a massive paint job. She recently bought a new home and all the ceilings, walls, doors, and trim were painted beige. Since my sister choose the color gray for her walls{and gray and beige don't really go all that well together}, we decided the first task was to paint all the ceilings white. Which meant EVERYTHING had to be taped off and covered. It was a large undertaking but we managed to get it all covered on Saturday. On Sunday, I went with my littlest to a friend's first birthday party{while my sister, brother-in-law, and mom stayed behind to paint everything}. The party was on the family's Christmas tree farm, where we celebrated outside and went hunting for baby pumpkins among the tress. So cute and fun!


Speaking of cute and fun, be sure to check out our posts from this week past, where Jill shared her adorable Mason Jar Toothbrush holder and I told you guys about the best potato salad recipe ever. Seriously, you have to try it.


Our fabulous features this week are:


Emily's Pick: Little Turkey No Sew Thanksgiving Onesie via Creative Ramblings
Lydia's Pick: Creepy Crawly Spider Earrings via Jewelry Making Journal
Jamie's Pick: Simple Homemade Caramel via Luv A Bargain
Jill's Pick: Pumpkin Ribbon Sculpture via The Ribbon Retreat Blog


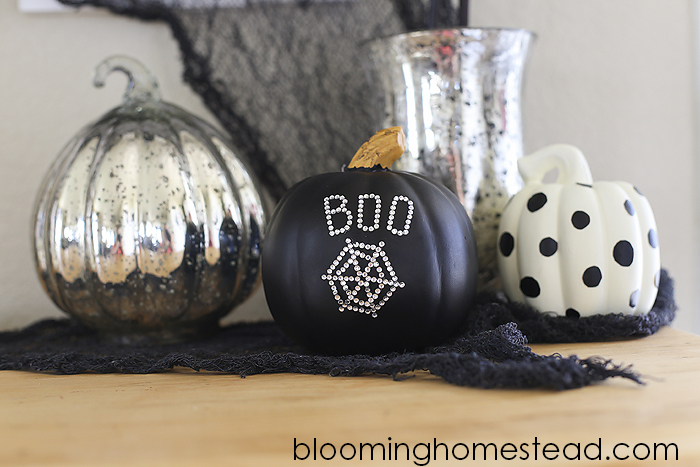
And our most clicked link this week was the awesome DIY Embellished Pumpkins tutorial via Blooming Homestead.


These DIY Embellished Pumpkins are so easy and add such a touch of Spook to your halloween decor! #Halloween #decor #pumpkin


Be sure to grab a button if you were one of our featured bloggers this week! And congratulations!!


And now, let's party!!

The Rules:

*We love our followers, and always follow back. Please follow us on GFC as well as BlogLovin:
Follow on Bloglovin
*You can also find us at these favorite social media sites: FacebookTwitterPinterestInstagram, and Google+
* Please link back to us in your post. Whether it be through a text link or by posting our super cute button somewhere in your post. We appreciate it!
* If you do NOT link back to us in your post, you will NOT be Featured on Much Ado About Monday. So, link back! You'll thank us later. :)

*Features posts will be pinned on Pinterest and promoted on Facebook and Google+
* Feel free to link up decorating tips, DIY projects, recipes, organizational ideas, sewing and crochet creations or anything else crafty or that you find inspirational.
* Please do not link up giveaways, Etsy shops, or projects that were not made by you.
* You may link up to three posts a week!
* If your post has been featured, please do not link it up again.
* Remember to visit, visit, visit! That's the point of a party, right? Have fun!
Thanks for stopping by to party with us!!


Friday, October 17, 2014

Mason Jar Toothbrush Holder

Hi, Y'all! 

I hope you all are having a wonderful Friday! I live for the weekends, even more so now that my oldest is in Kindergarten, and we've got some fun plans to look forward to :-) 

 Today I'm sharing these awesome mason jar toothbrush holders. 


They took less than 15 minutes to make and I absolutely love the look! They also double as cotton ball/q-tip holders. For now we'll keep the kid's toothbrushes in them... because we all know how long q-tips and cotton balls would last with a 4, 3, and 2 year old with sticky fingers  creative ideas.


To make these, we took a plank from a pallet and trimmed it to be 14 inches long. For the holders, my husband picked up some pipe clamps that were large enough to hold the medium sized mason jars. Because I didn't want to see the hanging hardware, and also wanted it to be very sturdy (being that it holds glass and kids will tug on it), we screwed them right into the wall with anchors.


The screws anchor the pallet to the wall, while the pipe clamps fit on like make-shift washers. The screw goes into the pipe clamp, through the pallet and into the wall anchor.


We hung the mason jars by the collar with the pipe clamps. All it took was a little bit of tightening with a screw driver. We clipped the excess pipe clamp and filed it down for a rounded edge.


And here they are, ta-dah!


Maybe one day they will serve a more decorative purpose, but for now, toothbrush holder it is!


Originally posted on From G2B