Monday, December 31, 2012

Peanut Butter Mouse Cookies {Recipe}

Cookies are delicious! I love them, any kind really, but cookies that are fun to make are definitely the best. My daughter loves to help me bake, so finding recipes that she can really participate with are great. So, when I found this recipe for Peanut Butter Mice Cookies in an old Taste of Home magazine, I was really excited to get started.


Not only are these cookies incredibly cute and fun to make, they are absolutely delicious too. Peanut butter with chocolate and candy accents... how could you go wrong!

 
Can't Get Started Without:
 
 
1 c. creamy peanut butter
1/2 c. butter, softened (no substitutes)
1/2 c. sugar
1/2 c. packed brown sugar
1 egg
1 tsp. vanilla extract
1 1/2 c. all purpose flour
1/2 tsp. baking soda
1/2 c. peanut halves
2 tbsp. M&M miniature baking bits
4 tsp. miniature semi-sweet chocolate chips
shoestring licorice cut into 2" pieces
(if you want your mice to coincide with the current holiday, you can add candy pieces or icing in any colour; ie. small pieces of green and red  candied cherries to look like holly for Christmas)


To begin, cream together your peanut butter, butter, sugar and brown sugar. Next, beat in your egg and vanilla. In a seperate bowl, combine your flour and baking soda. Slowly add it to the creamed mixture. 
 

 Jaydn helping to stir the flour and baking soda together.
 
 
When you've got your dough all mixed up, it is best to throw it into the fridge for about an hour to make it easier to work with. Hmm, what to do with your hour of waiting you ask... Well, you could tidy up your cookie mess, vacuum, do some laundry, etc. Or you could do what I do, and relax.... Maybe catch up on a favourite TV show and munch on all the M&M's, chocolate chips and peanuts that are out. :)
 
 
This batter is all ready to head into the fridge.
 
 
Now, that your dough is nice and cold, and your tummy is happily full, you can get started on the 'fun' aspect of these cookies and turn that delicious dough into cute little mice. Firstly, start by rolling your dough into 1" balls. Place them about 2" apart on your cookie sheet as these cookies really spread out.
Next pinch the ball at one end to give the mouse a nose. Now, is the time to get creative and give your mice some personality. This is the time when your little one can really get involved. Jaydn loved decorating the mice and making each one an individual. Start by placing two peanut halves to the top of the ball to create mouse ears. The chocolate chips come next for the eyes (place the tips of the chocolate chips into the batter for a better look). Finally, add your M&M's to give your mice noses. Jaydn thought it was fun to decide which colour of nose each mouse should get.


 Such concentration decorating her mice.
 
 
Now that all of your mice are 'made', it is time to bake them. In an oven preheated to 350 degrees, bake them for 10-12 minutes or until they are a nice golden brown colour. 
 
 
These little mice are ready for the oven. 
 
 
I used the time while the mice were baking to cut the licorice into pieces. These will be the finishing touches on the mice and give them their tails.


As soon as your mice come out of the oven, get them onto a cooling rack and get your 'tails' ready. While the cookies are still warm, gently insert one licorice piece into the back of each one.


Your cookie mice are now complete. Grab a glass of cold milk and dig in!!


Ingredients:

1 c. creamy peanut butter
1/2 c. butter, softened (no substitutes)
1/2 c. sugar
1/2 c. packed brown sugar
1 egg
1 tsp. vanilla extract
1 1/2 c. all purpose flour
1/2 tsp. baking soda
1/2 c. peanut halves
2 tbsp. M&M miniature baking bits
4 tsp. miniature semi-sweet chocolate chips
shoestring licorice cut into 2" pieces

Directions:

1. In a large mixing bowl, cream peanut butter, butter, sugar and brown sugar.
2. Beat in egg and vanilla.
3. In a separate bowl, combine the flour and baking soda; gradually add to the creamed mixture.
4. Refrigerate for 1 hour or until easy to handle.
5. Roll the dough into 1" balls. Place 2" apart on ungreased baking sheets.
6. Pinch each ball at one end to taper. Insert two peanut halves in center of each ball for ears.
7. Add one M&M baking bit for the nose and two chocolate chips for eyes.
8. Bake at 350 degrees for 10-12 minutes or until set.
9. Remove to wire racks to cool completely.
10. Gently insert one licorice piece into each warm cookie for a tail.
Yield: about 5 dozen

:


Linking up with:


Wednesday, December 26, 2012

Sea Salted Caramel Christmas Crack {Recipe}


I stumbled upon this recipe over at Cleverly Inspired for caramels last week and instantly knew that it was meant to be.

Seriously.

My favorite drink at Starbucks is the Salted Caramel Mocha. See? I told you . Meant to be! :)

Anyway, I pinned it with the intention of taking these delicious little treats to a Cookie Exchange/Ugly Sweater Party that our Mom's Group is having. What's the point in making delicious, melt-in-your-mouth caramel candies if you can't share them?

But, things didn't quite turn out as I had hoped. Humidity had it in for me and I didn't even know it! Apparently, candy won't set if it's humid out. I had no idea.

So... after lovingly tending to my caramels, they never hardened. After 24 hours of sitting out, they were still gooey, liquid-y and oh so delicious tasting. Major fail. *le sigh*

But, there was no way I was going to throw away that sea salted, caramel deliciousness. So, I poured it into a tupperware container and set it aside in the fridge to be dealt with on another day.

That day came last night. I remembered that once upon a time a friend of mine used to bring this treat she referred to as "Christmas crack" to holiday gatherings. It was divine! I decided to make my own version using my failed caramel concoction as substitute for her brown sugar/butter mixture.

And, while this recipe has Christmas in the title, do not let it fool you. It would be a great treat to bring along to a New Year's eve party or an awesome munchie for Super Bowl Sunday! :)

Let's get started!


Ingredients:
1 sleeve saltine crackers
sea salted caramels that didn't set (You can follow the recipe from Cleverly Inspired , just don't let the caramels set)
1 bag of milk chocolate chips


Directions:
1. Preheat oven to 400 degrees.
2. Spread crackers out in a single layer on a baking sheet. Pour caramel sauce over crackers. Using a spatula, spread so that all crackers are covered.
3. Bake for 6 minutes. As soon as you pull this out of the oven, pour an entire bag of chocolate chips on top. Let sit for 5 minutes.
4. Using a spatula, spread melted chocolate evenly over cracker/caramel mixture.
5. Let sit until completely cooled and hardened. Break into pieces and enjoy!


How easy is that folks? And it's SOOO good! Seriously. No wonder they call it crack.

I'm so glad that my epic kitchen failure turned into a delicious success!

Linking up with Live, Laugh, Rowe and Someday Crafts


Have you ever heard of or made "Christmas crack"? Any recent kitchen failures that you'd like to share with me?

Monday, December 24, 2012

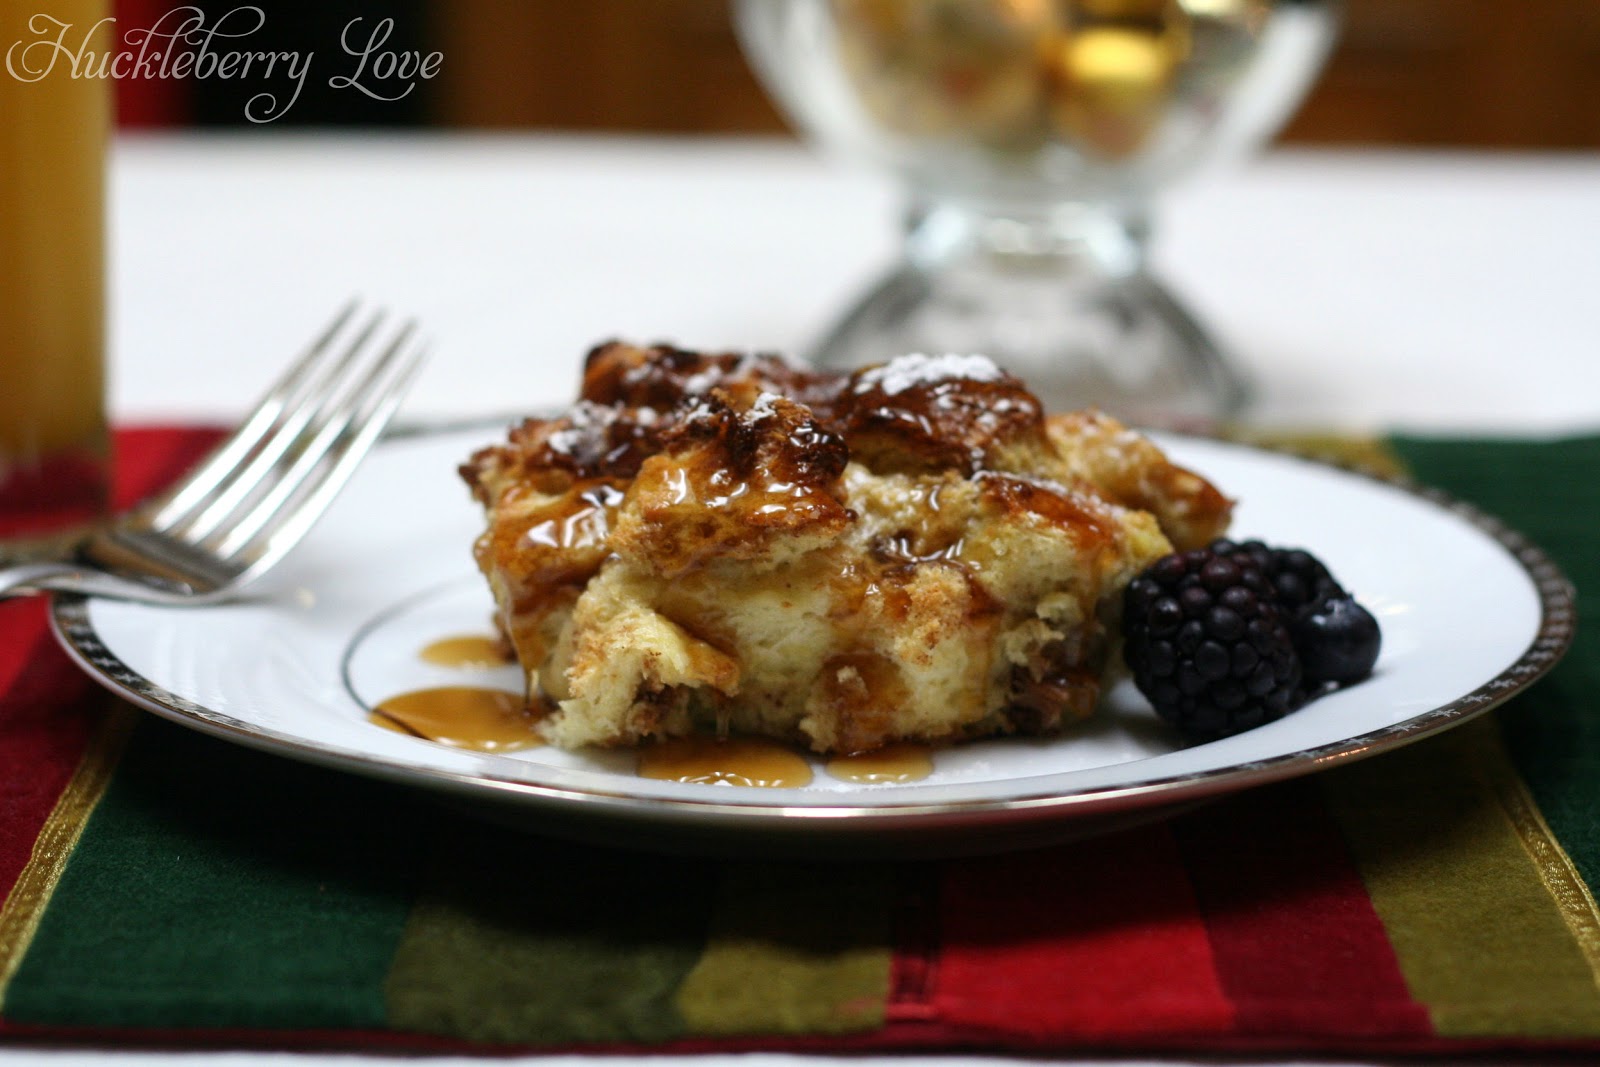
Eggnog French Toast Casserole

There is so much to love about the holidays! Christmas lights, family time, good times with friends, stockings hung by the chimney and...eggnog. I really love eggnog. To me, it tastes like Christmas. Creamy, spicy, Christmas goodness. The fact that you can't get eggnog any other time just makes it more special during the holiday season.

Which is why I love this dish! I tweaked my favorite french toast casserole recipe to incorporate eggnog and I am so happy with the results. Everyone that I have made it for has asked for the recipe so I thought I would share it with you too.

The great thing about this breakfast casserole (besides the heavenly taste) is that you can make it the night before and just pop it in the oven in the morning. Perfect for your Christmas morning breakfast!


Ingredients:
Challah bread
1/2 cup brown sugar
1 tsp. cinnamon
8 eggs
2 cups eggnog {make sure it's the spiced kind!}
2 tsp. vanilla extract
Butter, for greasing the pan


1. Cut the challah bread into inch cubes. I like using the challah bread because it's so airy and absorbs the egg mixture so well.


2.  Use the butter to grease the inside of a glass 9" by 13" casserole dish.


3. Mix the brown sugar and cinnamon together in a small bowl. 


4. Arrange half of the cubed bread in the casserole dish and top with half of the sugar mixture. Repeat with the remaining bread and sugar.


5. In a separate bowl, whisk together the eggs, eggnog and vanilla extract.


6. Starting at the edges, slowly pour the egg mixture on the bread and work towards the middle. 


7.  Use a spoon or spatula and press down on the bread to coat it with the egg mixture. Cover the casserole  dish with aluminum foil and refrigerate overnight or for at least four hours.


8. Preheat the oven to 350 degrees. Take the casserole from the fridge and bake covered for 20 minutes. Remove the aluminum foil and bake an additional 30 minutes or until the top is golden and puffy.


9. Top with powdered sugar and maple syrup. Enjoy!


I hope this makes your Christmas morning wonderful and delicious!


Linking up to:

More the Merrier Monday

Saturday, December 22, 2012

Christmas Printable

"Tomorrow is Christmas! It's practically here!" -How the Grinch Stole Christmas

Although Christmas isn't tomorrow, it certainly feels like it could be! What easier way to finish up your Christmas decor than with a fun printable. Simply print it and display for that last little touch.


This quote is my mom's favorite from How the Grinch Stole Christmas. I love that movie (the classic, Boris Karloff version, not the Jim Carrey version) and am so pleased with how the printable looks on my mantle. I like the gentle reminder to hold your loved ones close during the holiday season and not let stress overtake the joy of the season.

Get the printable HERE.

Are you ready for Christmas? Any last minute shopping or baking to do?

Linking up to:

Friday, December 21, 2012

Cute & Simple Stocking {Tutorial}

There's only a few days left until Christmas and I've been rushing around to finish up everything on my to-do list. I've just completed yet another semester of teaching, so my last couple of weekends have been filled with grading and all of those end of the semester chores. Last weekend, I was determined to not only close out the semester grades, but also finish a few last minute projects. On my list was this stocking for my youngest and a photo of the kids with Santa at our neighborhood holiday party. So here's how it turned out:


Not too shabby for a couple hours of work huh?

To get started, you will need:
-1/4 yard red velvet or fabric for the main part
-1/4 yard coordinating fabric for the cuff, I went with a bright green and sparkly corduroy
-1/2 yard trim (those cute puff balls)
-buttons, fabric, ric-rak, double sided fusible interfacing, embroidery floss, and anything else to add to the stocking. 

Note: I am self taught, quick, and take a very relaxed approach to sewing. Don't expect perfection here. ;)

First, begin with tracing your stocking onto your main fabric, outlining about 1/4" away from the edge. Cut, and pin right sides together. 


I drew a chalk line where I wanted my seam. Sew along your line, leaving the top open. Trim corners and any excess fabric. I also went ahead and serged the raw top edge to prevent stretching in future steps. 


Next, Take your coordinating fabric and trace the cuff about 1/4" larger than the original. Make the height as long as you want your cuff to be high (figuring in folding on the both bottom and top). Mine turned out to be about 8" wide by 9.5" tall.
Cut, pin right sides together, and serge or sew along each side. 


Flip the cuff fabric right-side-out and place around the top of the stocking that is right side out. 


This means that you will have wrong side to right side together, or right sides facing up. I only specify because I may or may not have done some seam ripping here ;). Sew or surge the top edges together and flip up so that the wrong side of the cuff is showing and the right side of the stocking is showing.


Fold over, hiding the seam, and pin trim upside-down onto the bottom of the cuff, about a 1/4 inch from the edge. 


Sew into place. Fold under and top-stitch. 


Now you're almost finished! Time to make the loop to hold the stocking. I took a 2" wide strip of fabric, folded it in half (right sides together), serged the edge, and flipped it right side out.

Tip: Don't use corduroy for the loop. It is incredibly difficult to turn right side out! I employed a chopstick and some curse words.  Next, make sure your cuff is at the right length. Place loop along the left side seam, at the top of the stocking and secure. Continue top-stitching along the whole top edge of the cuff.


At this point, you have a blank stocking. You can leave it as is, or decorate it to your heart's desire. In our family, each child has a different Christmas character on their homemade stocking. For little E, I went with a gingerbread girl appliqué because she is so sweet. 


And you can't have a sweet southern girl without a big bow! ;) I found that cute bow button at Joann's, along with the gumdrop buttons and mini ric-rac. I used double sided fusible interfacing and brown velveteen fabric to make the gingerbread girl. Embroidery floss helps to secure it in place.


Bonus: Because this project was so quick, we made it to the party and even got a decent photo with all three! 


So there you have it, a simple DIY Christmas stocking. Along with a 40% off coupon and my teacher's discount, this project cost me about $15. I felt so accomplished after this weekend and can officially say that I am ready for Christmas. Are you?

Joining the link party over at


Thursday, December 20, 2012

DIY Lighted Outdoor Wreath {Tutorial}

As part of my Christmas decorating this year, I wanted a big, lighted wreath to hang outside on my garage. After searching around a bit, I found that I wasn't going to be able to find one... well unless I wanted to spend over $150 for it (which I absolutely was NOT going to do). I decided I could make one just as nice for a lot cheaper, so I did. And now I'm going to share how I did it with all of you. :)


Can't Get Started Without:
~24" artificial undecorated, wire framed spruce wreath (you can use any size you need, however)
~2" wired Christmas ribbon (2 colours)
~pine cones
~poinsetta sprigs (I used a poinsetta candle holder and pulled it apart)
~wired holly berry sprigs
~strand of outdoor lights (green cord)
~string

All of the items I used I got at Hobby Lobby for 50% off!! The wreath was $20, the ribbon was $10, the poinsetta sprigs were $8, the holly was $2, and the the pine cones were $1 . I happened to have the strand of lights, but this time of year, you can find them at pretty much any store for under $10. My total cost was $41, a savings of over $100!!

The first thing I did was weave the strand of lights into the wreath. Make sure to weave it around the wire form of the wreath and then use the branches to cover up the strand. Make sure to plug in the lights after you do this to make sure your lights are spaced evenly before you add any of your decorations.

Next I attached the poinsetta sprigs. To attach them I just used the wreath branches and twisted them around the poinsetta petals. I didn't want to use glue, because I didn't know how it would hold up to the weather.

This is what happens when you leave your crafting stuff out with a little one around...lol.

I added the ribbon next. I wove it into the wreath the same way that I wove the strand of lights into it. I crisscrossed the two different colours of ribbon alternating over and under the poinsetta sprigs, to achieve better coverage. 

Next I twisted in the holly berry sprigs. Make sure that you use wire sprigs instead of plastic ones so that you can twist them into the wreath easily.

And, last but not least, I added the pine cones. Instead of glue, I used string to tie them onto the wreath. When you tie them on, make sure you tie the string around the wire form of the wreath and not just the branches so that it holds tightly.


The great part about this wreath is that you can be really creative with it. You can add basically any appliques you want, which gives you a ton of freedom. I am really happy with how it turned out. I think it is really pretty and best of all, inexpensive.

 
Have you ever made a Christmas wreath? What appliques did you use?

Sharing with Seven Thirty Three, Pincushion Creations and Clean & Scentsible